

Launching your first website can feel like a bigger deal than it actually is. If you’ve never dealt with hosting or domains before, the whole thing can seem intimidating — like there’s some hidden technical knowledge you’re supposed to already have. You don’t. From the moment you sign up to the moment your site is live, this genuinely takes minutes once you know where to click. Here’s exactly how.
What You’re Working With
Before getting into the steps, it’s worth knowing what Cyberin’s WordPress hosting actually gives you: high-performance servers, LiteSpeed caching for faster load times, one-click WordPress tools, automatic backups, and support if you get stuck at 2am. Doesn’t matter if you’re starting a blog, a business site, or an online store — the setup below is the same either way.
There’s also a genuinely easy-to-navigate dashboard, which matters more than people expect when you’re doing this for the first time and don’t want to feel lost.
Step 1: Pick a Hosting Plan
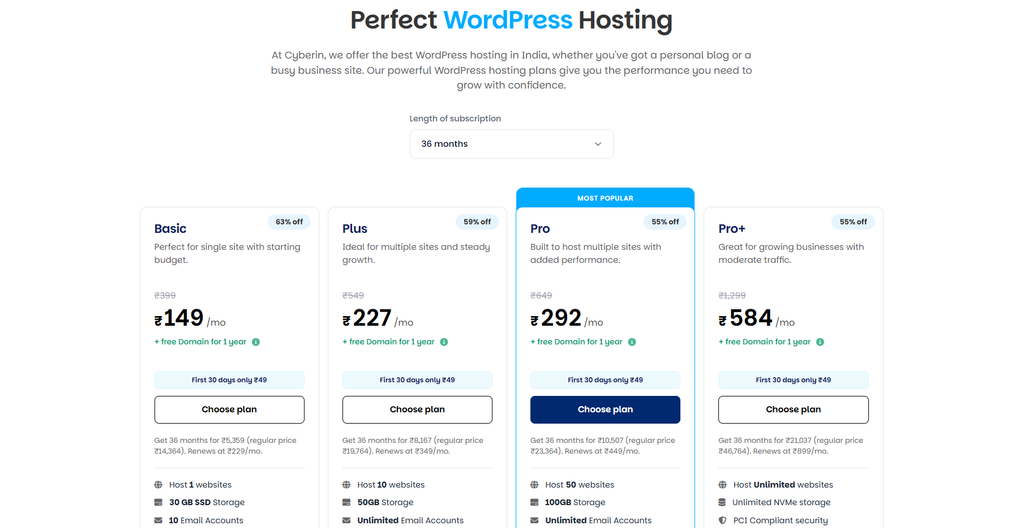
Head to the WordPress hosting page and choose whatever fits your needs right now — not necessarily what you think you’ll need in two years. A basic starter plan covers most first sites just fine. If your traffic or your store grows later, upgrading to more CPU and RAM is easy enough when you actually need it.
After checkout, you’ll get your account details — how to log into your Cyberin dashboard and cPanel. That’s your control center for everything from here on: installing WordPress, tweaking settings, managing your whole hosting environment.
Step 2: Point Your Domain at Cyberin
If you bought your domain somewhere else — GoDaddy, Namecheap, BigRock, take your pick — you’ll need to point it toward Cyberin’s nameservers.
These show up in your welcome email, and typically look something like:
ns1.cyberin.in
ns2.cyberin.in
Making the switch is simple enough:
- Log into wherever you registered the domain
- Find the Nameservers or DNS settings
- Swap the old ones out for Cyberin’s
- Save it
Propagation — the internet catching up to your change — can take anywhere from a few minutes to a couple of hours, so don’t panic if it’s not instant. And if you bought your domain directly through Cyberin, congratulations, you get to skip this step entirely.
Step 3: Get Into cPanel
Log into your Cyberin client area, pick your hosting plan, and click WordPress Manager or Login to cPanel. This is where WordPress actually gets installed and configured.
Step 4: Install WordPress the Easy Way
Most people should just use the one-click installer. There’s no prize for doing it the hard way.
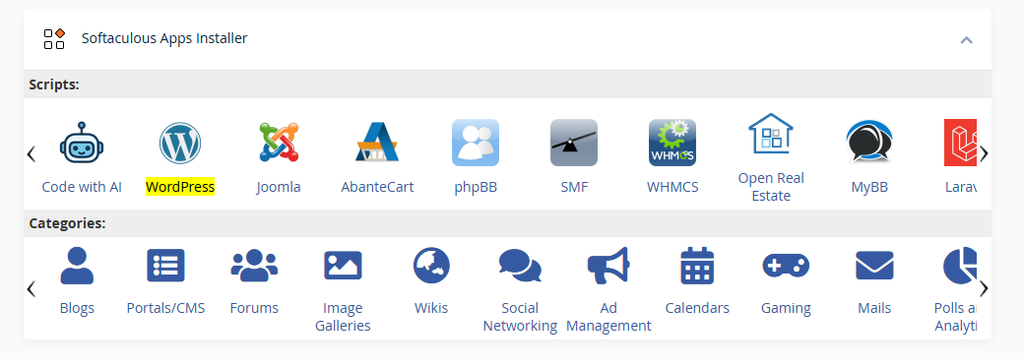
- Look for Softaculous Apps Installer or WordPress Manager inside cPanel
- Click WordPress, then Install Now
- Pick your domain from the dropdown
- Set your admin username, password, and email
- Give your site a name (you can always change it later — nobody gets this perfect on the first try)
- Turn on LiteSpeed Cache if it’s offered
- Hit Install
Give it a minute, and you’re done. You’ll get two URLs worth saving somewhere you’ll actually find them again: your admin login (yourdomain.com/wp-login.php) and your live site.
Step 5: The Manual Route (If You Want More Control)
Some people like doing things the long way, and that’s fair — you get more visibility into what’s actually happening.
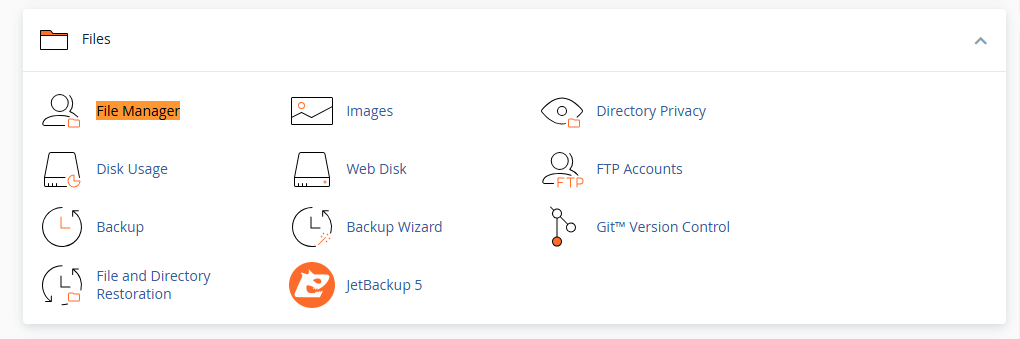
- Open File Manager in cPanel
- Upload the latest WordPress ZIP to your server
- Extract it into
public_html - Spin up a new MySQL database using the Database Wizard
- Create a database user and hand it full privileges on that database
- Head to your domain and run through WordPress’s own install wizard
It works, and it teaches you more about what’s under the hood — but it’s a handful of extra steps compared to just clicking “Install.” Most beginners skip straight to the auto-installer, and honestly, that’s the right call unless you have a specific reason not to.
Step 6: Handle the Basics Before You Get Carried Away
Once you’re logged into WordPress, resist the urge to immediately install fifteen plugins. Start with:
- A lightweight theme — Astra, Kadence, and Blocksy are all solid, fast-loading choices that won’t fight you later
- Permalinks set to “Post name” under Settings → Permalinks — better for SEO, and one of those settings almost nobody remembers to change until it’s too late
- A short list of essentials: an SEO plugin (Yoast or RankMath), Contact Form 7 if you need a contact form, and a backup plugin like UpdraftPlus — because at some point, something will break, and you’ll want a version of your site to go back to
Since Cyberin’s hosting runs on LiteSpeed caching, you generally have more room to add a reasonable number of plugins without watching your site slow to a crawl.
Step 7: Actually Publish Something
Once your pages and menus feel done — and they’re never really done, just done enough — hit publish. Your site is live. Cyberin include in free SSL, DDoS protection, and daily backups by default, so you’re starting with a decent security baseline without having to configure any of it yourself.
Conclusion
None of this is as complicated as it feels before you start. The one-click installer handles most of the heavy lifting in a few minutes, and the manual route is there if you’re curious or want more control. Either way, follow the steps in order, don’t rush the DNS part, and you’ll have a working WordPress site well before you expected to.